Water Heater Installation: 5 Simple Steps for Success
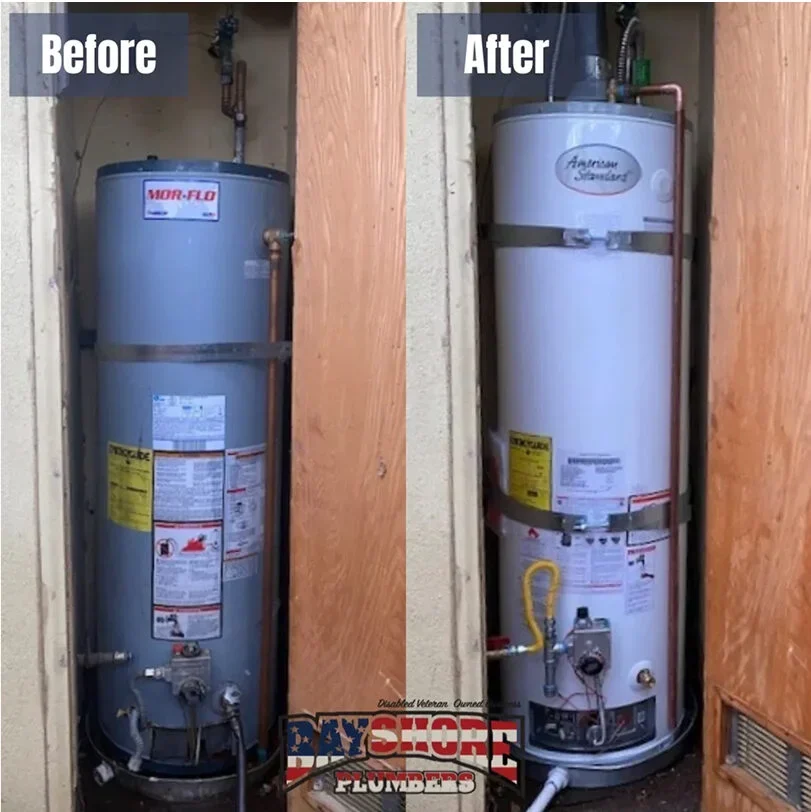
Water heater installation is a straightforward process that can greatly improve your home’s comfort and efficiency. If you’re dealing with an old or malfunctioning water heater, replacing it might be the best step to improve your energy efficiency and address any safety concerns. But how do you know it’s time for a replacement, and why is energy efficiency so crucial?
- Water heater replacement can solve problems like inconsistent hot water and high energy bills.
- Upgrading can improve energy efficiency, which reduces costs and environmental impact.
- Newer models come with improved safety features to prevent problems like leaks or malfunctions.
Many homeowners, especially those like Sarah Thompson from Redwood City, understand the importance of a reliable water heater to both their homes and businesses. With concerns about energy efficiency and safety rising, transitioning to a modern water heater is not only a smart move but also a practical one. Whether you’re replacing an old unit because it’s on its last legs or simply seeking better performance, investing some time in a new water heater can bring lasting benefits.

Step 1: Assess Your Current Water Heater
Before jumping into a water heater installation, it’s crucial to assess your current unit. This step helps determine if a replacement is necessary and ensures you choose the right new model. Here are key factors to consider:
Age
Water heaters typically last about 8-12 years. If yours is nearing or past this range, it might be time for a change. Older units tend to be less efficient and more prone to issues. Check the manufacturer’s label for the installation date or refer to your purchase records.
Leaking
Leaks are a clear sign that your water heater needs attention. Look for puddles or water stains around the base. While some leaks can be repaired, persistent or severe leaks often mean it’s time for a replacement. Leaking can also lead to water damage, so address it quickly.
Insufficient Hot Water
Is your water heater struggling to provide enough hot water? This could indicate a failing heating element or a sediment buildup inside the tank. If you’re constantly running out of hot water, it might be more cost-effective to replace the unit rather than repair it.
Strange Noises
Rumbling, popping, or banging noises are not normal. These sounds usually result from sediment buildup, which causes the tank to overheat and degrade faster. Regular flushing can help, but if noises persist, consider replacing the heater.

Assessing these factors will guide you in deciding whether to repair or replace your water heater. If you’re unsure, consulting a professional from Bayshore Plumbers can provide clarity and ensure your home remains comfortable and efficient.
Next, we’ll explore how to choose the right water heater for your needs, considering factors like type, energy efficiency, and cost.
Step 2: Choose the Right Water Heater
Selecting the right water heater is crucial for efficiency and cost savings. There are two main types to consider: tank and tankless models. Each has its pros and cons, so let’s dive into the details.
Tank vs. Tankless
Tank Water Heaters are the traditional choice. They store a set amount of hot water, usually between 30 to 50 gallons, depending on the size. These units are generally less expensive upfront and easier to install. However, they can run out of hot water during high demand and tend to be less energy-efficient over time because they constantly heat the stored water.
Tankless Water Heaters, on the other hand, heat water on demand. This means you get hot water whenever you need it without waiting. They are more energy-efficient since they don’t keep water hot when not in use. While the initial cost is higher, they offer long-term savings on energy bills. Plus, they take up less space, which can be a significant advantage in smaller homes.
Energy Efficiency
Energy efficiency is a key factor when choosing a water heater. Tankless models generally have a higher efficiency rating, which can translate into lower utility bills. According to the U.S. Department of Energy, tankless water heaters can be 24% to 34% more energy-efficient for homes that use 41 gallons or less of hot water daily.
For those using more, a tank model with high-efficiency features, like better insulation or a heat trap, can still be a viable option. Look for the Energy Star label as a guide to find efficient models.

Cost Considerations
When considering costs, think beyond the initial purchase price. While tank heaters are cheaper upfront, tankless heaters can save you money in the long run due to lower operating costs.
Here’s a quick comparison to help you decide:
| Factor | Tank Heater | Tankless Heater |
|---|---|---|
| Initial Cost | Lower | Higher |
| Installation Cost | Lower | Higher |
| Operating Cost | Higher | Lower |
| Lifespan | Shorter (10-15 years) | Longer (20+ years) |
| Space Requirement | More | Less |
Consider your home’s hot water needs, space availability, and budget when making your choice. If you’re unsure, Bayshore Plumbers can help you weigh these factors and make the best decision for your home.
Choosing the right water heater can impact your home’s comfort, energy use, and expenses. Next, we’ll discuss how to prepare for the installation process, ensuring everything goes smoothly.
Step 3: Prepare for Installation
Before you start your water heater installation, it’s crucial to prepare properly. This step ensures a smooth process and helps avoid common pitfalls. Here’s what you need to do:
Tools and Materials
Gathering the right tools and materials is essential. Here’s a basic list to get you started:
- Pipe Wrench: For tightening and loosening plumbing connections.
- Screwdrivers: Both flathead and Phillips for various screws.
- Tape Measure: To ensure accurate measurements.
- Tubing Cutter: For cutting pipes to the correct length.
- Teflon Tape: To seal pipe threads and prevent leaks.
- Bucket: To catch any water that might spill during the process.
- Safety Goggles and Gloves: To protect yourself from potential hazards.
Additionally, you might need specific items depending on the type of water heater. Check the manufacturer’s instructions for any special requirements.
Building Codes
Compliance with local building codes is non-negotiable. These codes ensure safety and efficiency in your home’s plumbing system.
- Check Local Regulations: Visit your local government website or contact the building department to understand specific requirements.
- Installation Standards: Make sure you follow the standards for venting, pressure relief valves, and electrical connections.
- Energy Efficiency Codes: Some areas have regulations to ensure energy-efficient installations. Look for these to potentially save on energy costs.
Ignoring building codes can lead to fines or having to redo the installation, so it’s best to get it right the first time.
Permits
In many areas, a permit is required for water heater installation. This is a step that many DIY enthusiasts overlook but is crucial for legal and safety reasons.
- Apply for a Permit: Contact your local building authority to find out if you need a permit. This often involves filling out a form and paying a fee.
- Schedule Inspections: Once the installation is complete, an inspection may be required to ensure everything meets code. This step verifies that your work is safe and compliant.
Securing the necessary permits not only keeps you on the right side of the law but also adds a layer of safety and reliability to your installation.
By preparing thoroughly with the right tools, understanding building codes, and obtaining necessary permits, you’re setting the stage for a successful water heater installation. Next, we’ll guide you through the actual installation process, including how to safely remove your old heater and connect the new one.
Step 4: Install the New Water Heater
Now that you’re prepared, it’s time to dive into the actual installation process. Follow these steps carefully to ensure a smooth and safe water heater installation.
Shut Off Utilities
Before you begin, safety first. It’s crucial to turn off all utilities connected to your current water heater.
- Electricity: If your water heater is electric, switch off the power at the circuit breaker. This prevents any risk of electric shock.
- Gas: For gas heaters, turn off the gas supply. Locate the gas valve and turn it to the “off” position.
- Water Supply: Shut off the cold water supply to the heater. This is usually a valve located above the heater.
These steps are essential to ensure your safety and prevent any accidents during the removal process.
Remove Old Heater
With the utilities safely turned off, you can now remove the old water heater.
-
Drain the Tank: Attach a garden hose to the drain valve at the bottom of the tank. Run the hose to a suitable drainage location, then open the valve to drain the water. Be cautious, as the water may still be hot.
-
Disconnect Pipes: Use a pipe wrench to disconnect the water pipes and gas line (if applicable). Be sure to have a bucket handy to catch any remaining water.
-
Remove the Unit: With help, carefully move the old water heater out of its location. These units can be heavy, so take care to lift properly or use a dolly if needed.
Removing the old heater makes room for the new one and is a critical step in the process.
Connect New Heater
With the old unit out of the way, it’s time to install the new water heater.
-
Position the New Heater: Place the new unit in the same location as the old one. Ensure it’s level and stable.
-
Reconnect Pipes: Attach the water supply lines using the pipe wrench. Apply Teflon tape to the threads to prevent leaks. If it’s a gas heater, reconnect the gas line and check for leaks using a soapy water solution.
-
Fill the Tank: Open the cold water supply valve to fill the tank. Ensure all connections are secure and check for leaks.
-
Restore Utilities: Once the tank is full, turn on the electricity or gas supply. For gas heaters, follow the manufacturer’s instructions to relight the pilot light.
By following these steps, you can install your new water heater efficiently. Next, we’ll cover how to test and finalize your installation to ensure everything is working perfectly.
Step 5: Test and Finalize Installation
Congratulations on installing your new water heater! Now, it’s crucial to ensure everything is working correctly and safely. Let’s walk through the final steps to test and finalize the installation.
Check for Leaks
Once the new water heater is set up, the first thing to do is check for leaks. Here’s how:
-
Inspect Connections: Look closely at all the water and gas connections. Use a flashlight if needed to see clearly.
-
Use a Soapy Water Solution: For gas connections, apply a soapy water solution around the joints. If you see bubbles forming, there’s a leak. Tighten the connections carefully and test again.
-
Monitor the Water Tank: After filling the tank, observe the area around the base for any signs of water pooling. This can indicate a leak that needs fixing.
Adjust Temperature
Setting the right temperature on your water heater is vital for both comfort and safety.
-
Locate the Thermostat: Most water heaters have a thermostat that allows you to adjust the temperature. It’s usually found near the bottom of the tank.
-
Set the Temperature: For optimal energy efficiency and safety, set the thermostat to 120°F (49°C). This temperature helps prevent scalding and reduces energy usage.
-
Test the Water: After setting the temperature, turn on a hot water faucet and measure the water temperature with a thermometer to ensure it’s at your desired setting.
Safety Checks
Performing a few safety checks ensures your water heater operates safely and efficiently.
-
Pressure Relief Valve: Test the pressure relief valve by lifting the lever and letting it snap back. This should release a burst of water into the drainpipe. If not, the valve may need replacing.
-
Ventilation: For gas water heaters, ensure proper ventilation. Check that the vent pipe is securely attached and free of obstructions to prevent dangerous gas buildup.
-
Electrical Safety: If your unit is electric, double-check that all wires are connected securely and that there are no exposed wires or signs of damage.
By following these steps, you can rest assured that your new water heater is installed correctly and safely. Next, let’s address some common questions about the cost and feasibility of water heater installations.
Frequently Asked Questions about Water Heater Installation
What is the labor cost to install a hot water heater?
The cost of labor for a water heater installation can vary based on several factors, including the type of heater and your location. In general, plumbers charge between $45 to $200 per hour, with the average installation taking about 2 to 3 hours. This means you might expect to pay anywhere from $90 to $600 for labor alone.
If your installation requires an electrician, especially for electric water heaters, expect additional costs. Electricians typically charge around $50 to $100 per hour. Bayshore Plumbers, with locations in Redwood City, San Mateo County, and Palo Alto, can offer competitive rates and ensure professional service.
Can I install a water heater by myself?
While a DIY-install might seem tempting to save money, it’s crucial to consider the complexity and risks involved. Installing a water heater requires knowledge of plumbing, electrical work, and in some cases, gas connections. Mistakes can lead to leaks, electrical hazards, or even gas leaks, posing serious safety risks.
Moreover, improper installation can void the warranty of your new water heater. If you decide to tackle this project yourself, make sure you understand the local building codes and have the necessary permits. For most people, hiring a professional like Bayshore Plumbers ensures a safe and compliant installation.
Do I need a plumber to install a water heater?
While it’s not legally required to hire a plumber, it is highly recommended. Professional plumbers are familiar with licensing requirements, building codes, and safety compliance measures necessary for a proper installation. They can also ensure that the installation meets local regulations, which is especially important if you plan to sell your home in the future.
In some areas, certain installations may require a licensed professional by law. Hiring a plumber like Bayshore Plumbers guarantees that your installation is done correctly, safely, and efficiently, providing peace of mind and potentially saving you money on future repairs.
By understanding these aspects, you can make an informed decision about your water heater installation. Next, let’s explore the benefits of choosing professional installation services like those offered by Bayshore Plumbers.
Conclusion
Choosing a new water heater is a significant decision for any home or business. The installation process can be complex, and ensuring it is done correctly is crucial for safety and efficiency. That’s where Bayshore Plumbers comes in.
With years of experience in both residential and commercial plumbing services, Bayshore Plumbers offers expert water heater installation. Our skilled technicians are equipped to handle both traditional and tankless systems, ensuring you get the best fit for your needs. We focus on delivering high-quality, reliable service that meets all safety and building code requirements.
Our customers have consistently praised our professionalism and attention to detail. One client noted how we “worked quickly and kept everything very tidy,” while another appreciated our ability to “leave the jobsite clean” and finish to a “level of perfection.” These testimonials reflect our commitment to customer satisfaction and our dedication to providing top-notch service.
When you choose Bayshore Plumbers, you’re not just getting an installation; you’re getting peace of mind. Our team is ready to assist you 24/7, ensuring that your water heater is installed safely and efficiently, minimizing any disruption to your routine.
For those in Redwood City, San Mateo County, and Palo Alto, Bayshore Plumbers is your go-to choice for professional water heater installation. Trust us to handle your installation with precision and care, so you can enjoy reliable hot water for years to come.